Buckwheat Banana Crepes

Buckwheat Banana Crepes
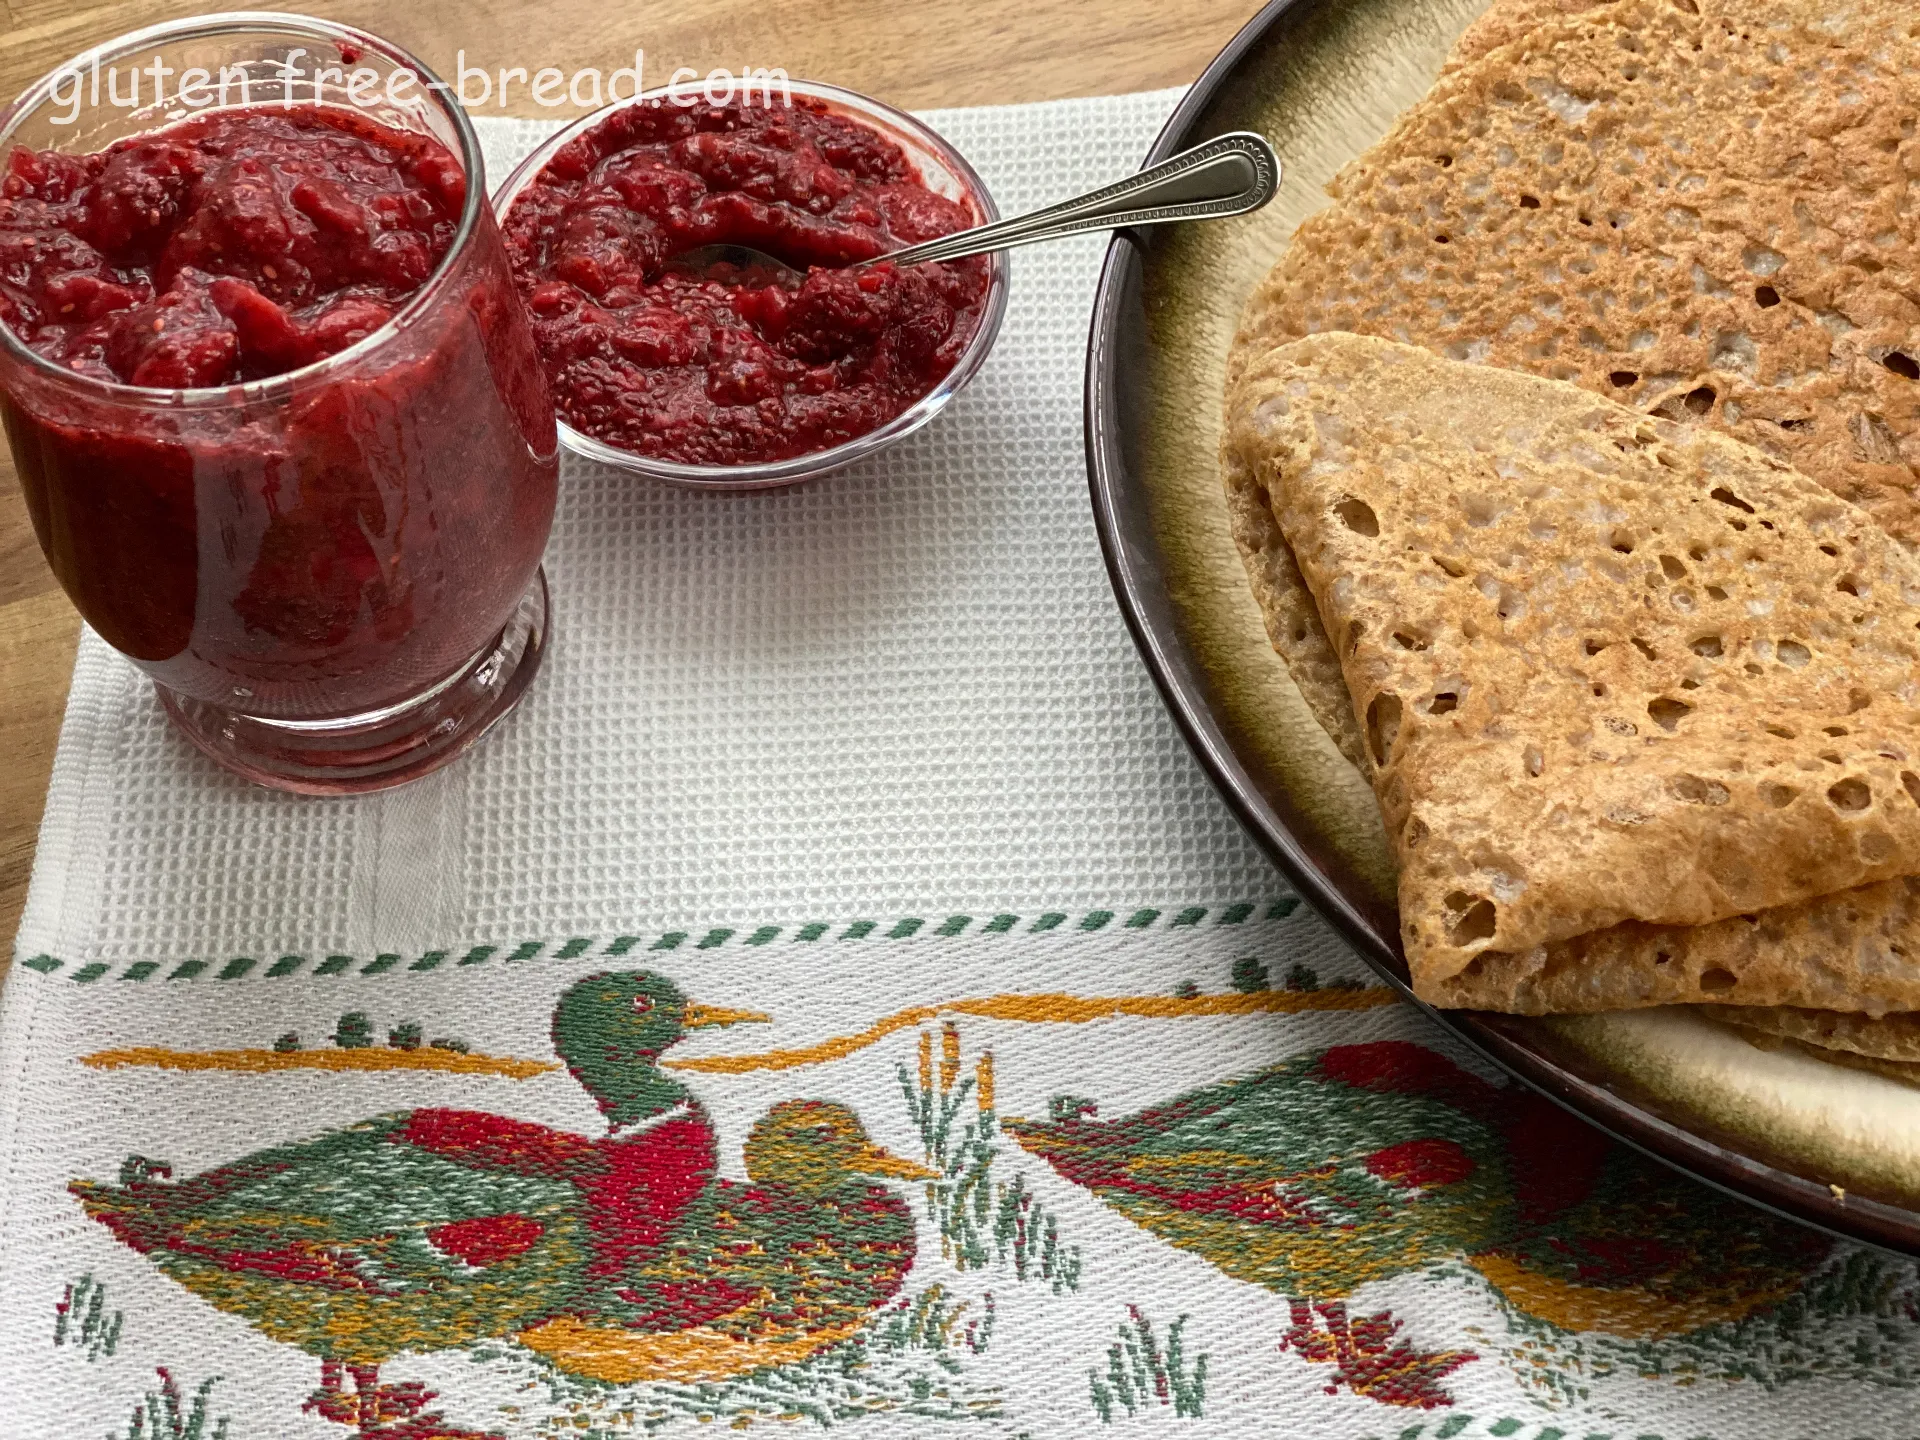
Buckwheat Banana Crepes topped with Chia Seed Jam with Frozen Fruit or Chia Seed Jam with Fresh Fruit are one of the most nutritious and healthy types of vegan breakfast for the whole family. Buckwheat Crepes Banana have tons of little holes on top that give them a light, spongy and tender texture. Serve and enjoy!
0 Likes
0 Comments
Login
GF
DF
LC
OF
YF
NF
VG
EF

Gluten Free, Dairy Free, Low Carbs, Oil Free, Yeast Free, Nut Free, Vegan, Egg Free

GF
Gluten Free
LC
Low Carbs
SF
Sugar Free
DF
Dairy Free
OF
Oil Free
YF
Yeast Free
EF
Egg Free
VG
Vegan
NF
Nut Free

Ingredients:

NameMetricUSTIP
Raw Buckwheat Groats200 gr1 cup
Banana1 2/3 cup
Water350 ml1 1/2 cups
Salt3 gr1/2 teaspoon
Baking Soda3 gr1/2 teaspoon
Apple Cider Vinegar15 ml1 tablespoon

Optional Ingredients:

5 ml/ 1 tsp Vanilla
3 gr / ½ teaspoon Cinnamon

Equipment:

Blender

Steps:

  • Buckwheat Banana Crepes
    Rinse Buckwheat (1 cup), then add to a large bowl and cover with twice the amount of lukewarm water. Soak uncovered at room temperature for at least 6 hours, or overnight.

    Rinse Buckwheat (1 cup), then add to a large bowl and cover with twice the amount of lukewarm water. Soak uncovered at room temperature for at least 6 hours, or overnight.

  • Buckwheat Banana Crepes
    Drain and rinse once more the soaked buckwheat.

    Drain and rinse once more the soaked buckwheat.

  • Buckwheat Banana Crepes
    Combine all the ingredients: soaked Buckwheat, Water (1 ½ cups), Banana, Baking Soda ( ½ tsp ), Salt (1/2 tsp ) and Apple Cider Vinegar (1 tbsp) in a blender. Blend until smooth.

    Combine all the ingredients: soaked Buckwheat, Water (1 ½ cups), Banana, Baking Soda ( ½ tsp ), Salt (1/2 tsp ) and Apple Cider Vinegar (1 tbsp) in a blender. Blend until smooth.

  • Buckwheat Banana Crepes
    Let it rest on the counter for 10 minutes.

    Let it rest on the counter for 10 minutes.

  • Buckwheat Banana Crepes
    Meanwhile, preheat a crepe pan or non-stick skillet over medium heat (for at least 5 minutes). This step is very important, so crepes will not stick to the pan! The pan should be heated to medium before adding the batter. If the heat is too high, the batter won’t spread to the edges of the pan before setting, and can result in holes or uneven thickness.

    Meanwhile, preheat a crepe pan or non-stick skillet over medium heat (for at least 5 minutes). This step is very important, so crepes will not stick to the pan! The pan should be heated to medium before adding the batter. If the heat is too high, the batter won’t spread to the edges of the pan before setting, and can result in holes or uneven thickness.

  • Buckwheat Banana Crepes
    Brush the pan very lightly with oil. Coat the pan with about 1/3 cup of crepe batter, cook until the edges start to brown, then flip the crepe. Cook for 10 more seconds and remove from the pan. Continue with the rest of the crepes, adjusting heat up or down and lightly oil the pan, if needed. You should yield 8 crepes.

    Brush the pan very lightly with oil. Coat the pan with about 1/3 cup of crepe batter, cook until the edges start to brown, then flip the crepe. Cook for 10 more seconds and remove from the pan. Continue with the rest of the crepes, adjusting heat up or down and lightly oil the pan, if needed. You should yield 8 crepes.

  • Buckwheat Banana Crepes
    Best served when fresh, but you can store leftovers sealed in the refrigerator for up to 3 days. To freeze, layer between pieces of parchment paper (to prevent sticking) and freeze. Then store in a freezer-safe container for up to 1 month. To reheat, warm in a 350-degree F (175C) oven or microwave until hot.

    Best served when fresh, but you can store leftovers sealed in the refrigerator for up to 3 days. To freeze, layer between pieces of parchment paper (to prevent sticking) and freeze. Then store in a freezer-safe container for up to 1 month. To reheat, warm in a 350-degree F (175C) oven or microwave until hot.

Comments:

  • Buckwheat Banana Crepes

    Buckwheat Banana Crepes

    Here are some tips for making perfect crepes:

    1. Use the right batter consistency: The crepe batter should be thin, similar to the consistency of heavy cream. If it's too thick, the crepes will be too dense; if it's too thin, they may tear easily.

    2. Let the batter rest: Allow the batter to rest for at least 10 minutes before cooking. This allows the flour/grains to fully hydrate and results in smoother crepes.

    3. Preheat the pan: Preheat a non-stick skillet or crepe pan over medium heat before adding the batter. The pan should be hot enough that a drop of water sizzles and evaporates immediately.

    4. Use the right amount of batter: Pour just enough batter into the pan to thinly coat the bottom when swirled. You can use a ladle or measuring cup to portion out the batter.

    5. Swirl the batter: Once you pour the batter into the pan, quickly tilt and rotate the pan to spread the batter evenly in a thin layer. This helps create a uniform thickness for the crepe.

    6. Cook on one side first: Cook the crepe on one side until the edges start to brown slightly and the surface appears dry, about 1-2 minutes.

    7. Flip carefully: Use a thin spatula to gently lift and flip the crepe. If you're new to making crepes, you can use your fingers to help guide the crepe as you flip it.

    8. Cook briefly on the other side: Cook the crepe on the other side for another 15 seconds or until lightly browned.

    9. Addind baking soda:Adding baking soda to crepe batter is often optional. If a recipe calls for soda but you prefer not to use it or don't have any on hand, you can often omit it without affecting the outcome of the crepes. The crepes may be slightly denser and may not brown as evenly, but they still will be tasty and perfectly edible.

    10. Keep warm: If you're making a large batch of crepes, you can keep them warm by covering the stack with a clean kitchen towel while you finish cooking the rest.

    11. Experiment with fillings: Get creative with your crepe fillings! Sweet options like Nutella, fresh fruit, whipped cream, or jam are classic choices, while savory options like cheese, ham, spinach, or mushrooms can also be delicious.

    With practice and patience, you'll be able to master the art of making perfect crepes every time!

Buckwheat Banana Crepes additional information:

Soaking grains when cooking quick breads can provide several advantages:

  1. Moisture retention: Soaking grains helps them absorb moisture, resulting in a softer and more moist texture in the finished bread. This can prevent the bread from becoming dry or crumbly, enhancing its overall quality and enjoyment.

  2. Improved texture: Soaking grains can soften their texture, making them easier to incorporate into the batter or dough. This can result in a smoother and more uniform texture in the final product, with fewer noticeable grainy or gritty bits.

  3. Enhanced flavor: Soaking grains can help release their natural sugars and starches, resulting in a richer and more flavorful bread. This can contribute to a more complex taste profile and a more enjoyable eating experience.

  4. Digestibility: Soaking grains can help break down anti-nutrients, such as phytic acid, which can inhibit the absorption of nutrients in the body. This can improve the digestibility of the bread and increase the availability of nutrients for absorption.

  5. Nutritional benefits: Soaking grains can increase their nutritional value by activating enzymes that help break down complex carbohydrates and proteins. This can make the nutrients in the grains more bioavailable, allowing your body to better absorb and utilize them.

Overall, soaking grains when cooking quick breads can result in bread that is softer, more flavorful, and easier to digest, while also maximizing its nutritional content. It's a simple technique that can significantly improve the quality of the finished product and enhance your overall baking experience.

Adding vinegar when soaking grains can offer several benefits, particularly in terms of reducing the phytic acid content in grains, which can inhibit the absorption of minerals like iron, zinc, and calcium in the body. Here's why adding vinegar when soaking grains can be beneficial:

  1. Reduction of phytic acid: Vinegar is acidic, and this acidity can create an environment that breaks down phytic acid during soaking. Phytic acid is an anti-nutrient found in the outer layer of grains and seeds, which can bind to minerals and inhibit their absorption in the body. By adding vinegar to the soaking water, the acidity helps reduce the phytic acid content, increasing the bioavailability of minerals in the grains and seeds.

  2. Improved digestibility: Breaking down phytic acid during soaking can improve the digestibility of grains and seeds. Phytic acid can also inhibit the activity of digestive enzymes, so reducing its content can aid in the digestion and absorption of nutrients.

  3. Enhanced nutrient absorption: By reducing the phytic acid content, adding vinegar when soaking grains can increase the availability of minerals like iron, zinc, and calcium in the body. This can lead to better overall nutrient absorption and utilization.

  4. Potential flavor enhancement: While vinegar itself may not significantly affect the flavor of the grains, it can add a subtle tanginess that may complement certain dishes. However, it's important to use vinegar in moderation to avoid overpowering the natural flavors of the grains.

Overall, adding vinegar when soaking grains can be a beneficial practice, especially for individuals looking to maximize the nutritional benefits of grains and seeds in their diet. However, it's important to note that soaking times may vary depending on the type of grain and the desired outcome, so it's best to follow a recipe or guideline for best results.

Generally, a small amount of vinegar is added to the soaking water to provide the benefits of acidification without overwhelming the flavor of the grains.

A common ratio is about 1 to 2 tablespoons of vinegar per cup of water used for soaking grains. However, this can be adjusted based on individual taste preferences and the specific recipe being used. Some recipes may call for slightly more or less vinegar depending on the desired flavor profile and the type of grains being soaked.

It's important to use vinegar in moderation, as too much can overpower the flavor of the grains and the final dish. White vinegar, apple cider vinegar, or rice vinegar are popular choices for soaking grains.